IT Solutions Provider

Categories
Blogs

How To Filter Traffic with AWS Web Application Firewall – Part One

How To Filter Traffic with AWS Web Application Firewall - Part One

AWS Web Application Firewall WAF

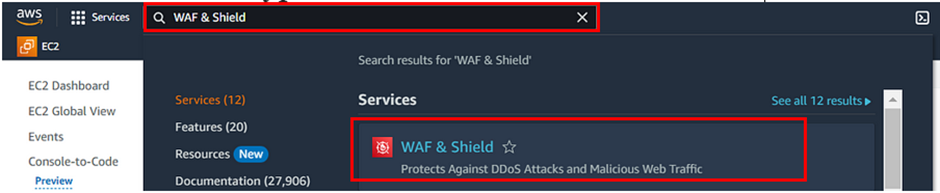
What is AWS Web Application Firewall?

AWS Web Application Firewall is a web application firewall that helps you protect your web applications against common web exploits that might affect availability and compromise security.

WAF helps protect web applications by filtering and monitoring HTTP traffic between a web application and the internet. It typically protects web applications from attacks such as cross-site forgery, cross-site scripting (XSS), file inclusion, and SQL injection, among others

How does it work?

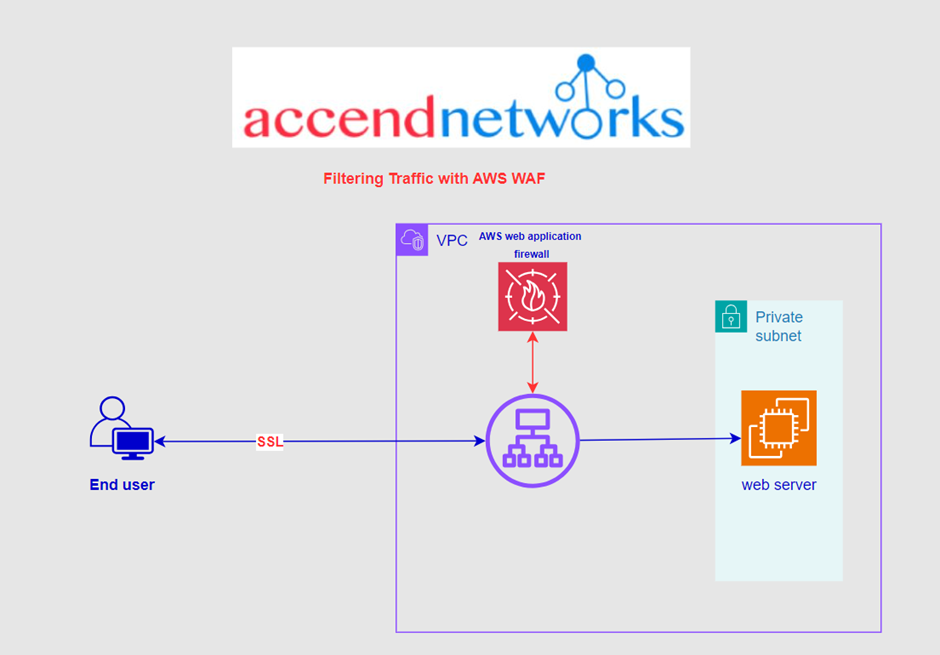
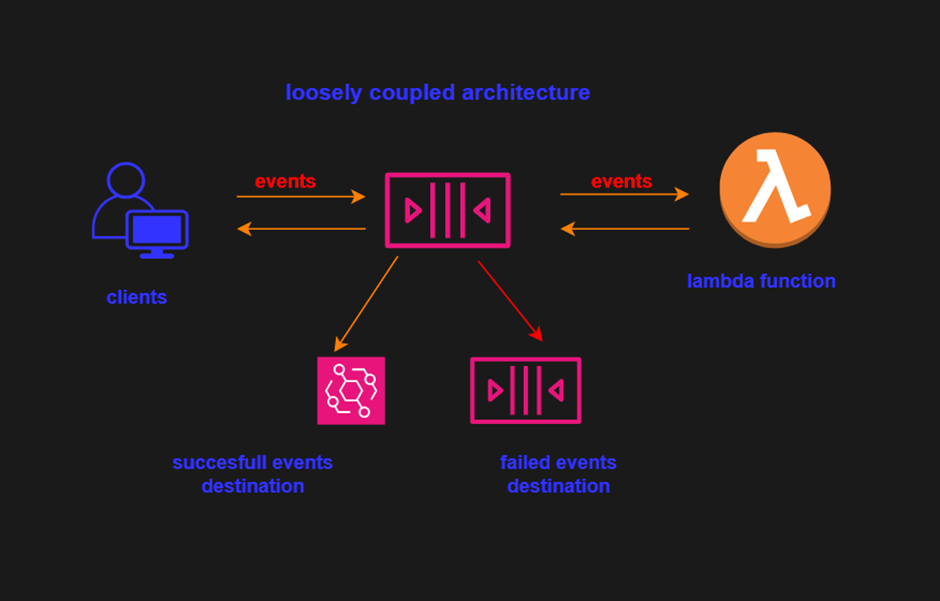
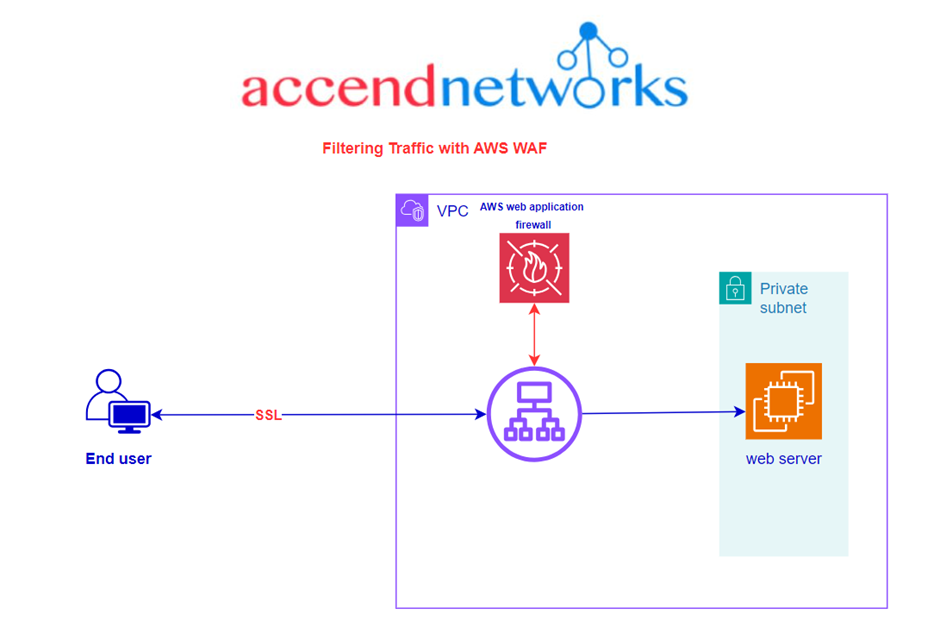
By deploying a WAF for a web application, a shield is placed between the web application and the internet. WAF is a reverse proxy, protecting the server from exposure by having clients pass through the WAF before reaching the server.

AWS Web Application Firewall WAF

A WAF operates through a set of rules often called policies. These policies aim to protect against vulnerabilities in the application by filtering out malicious traffic.|


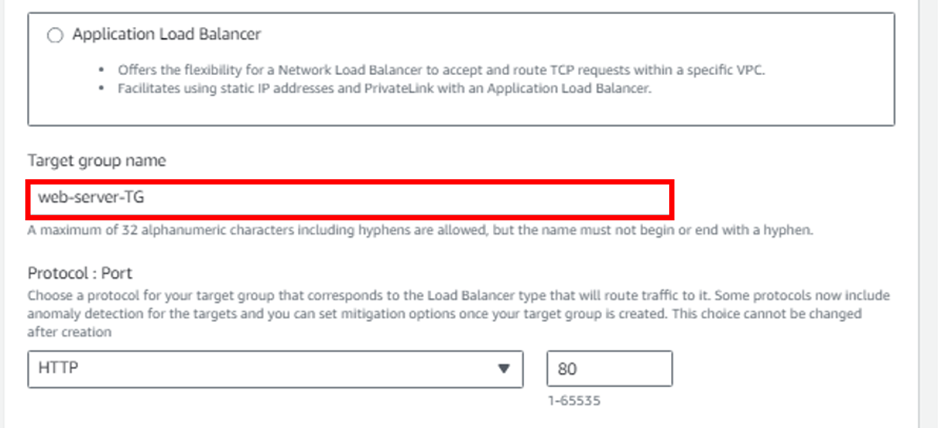
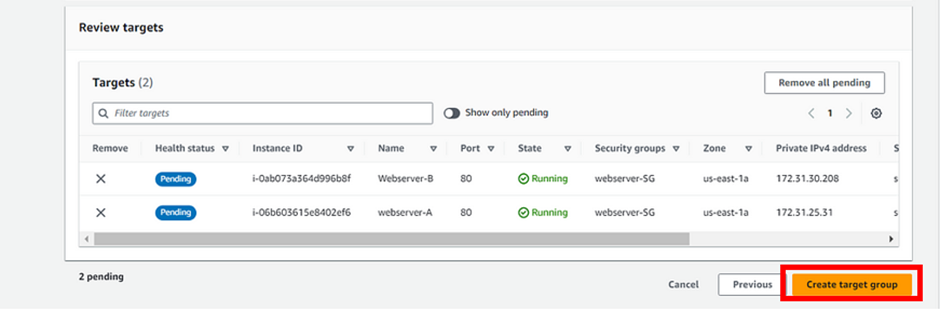
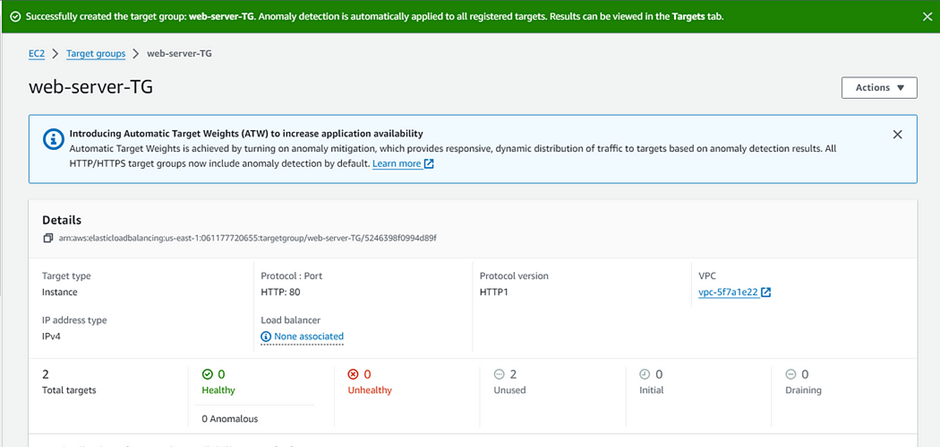
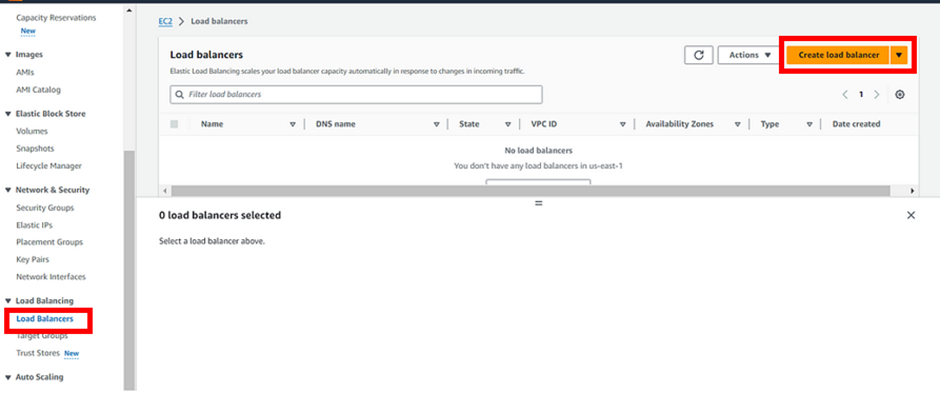
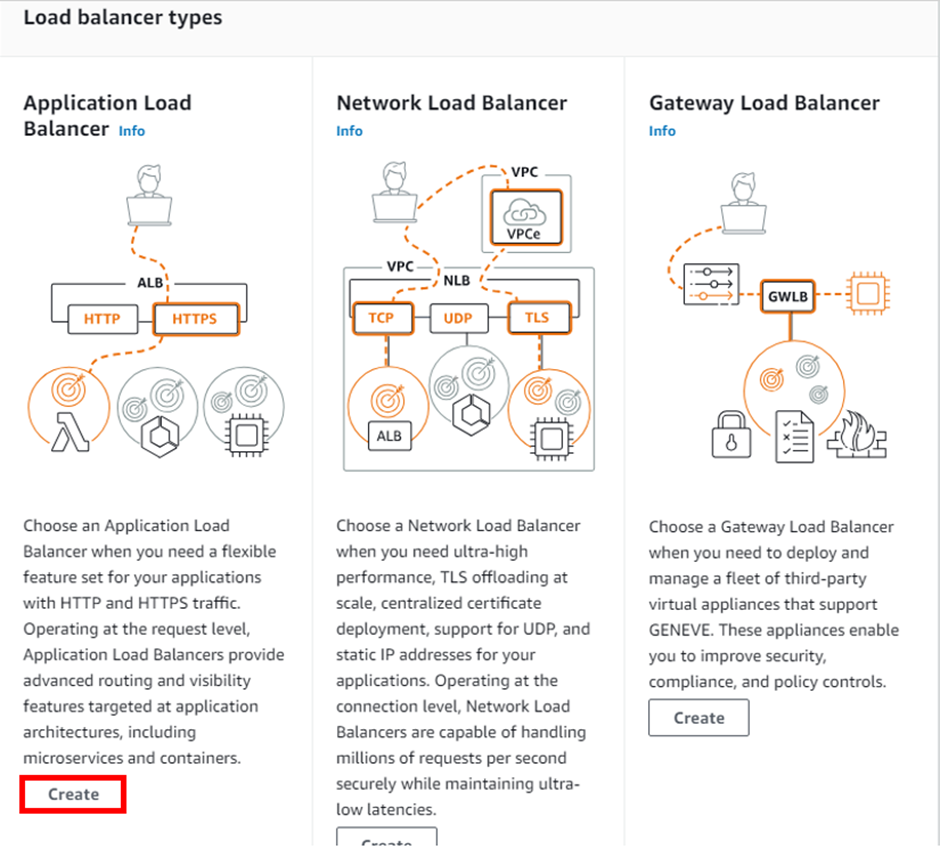
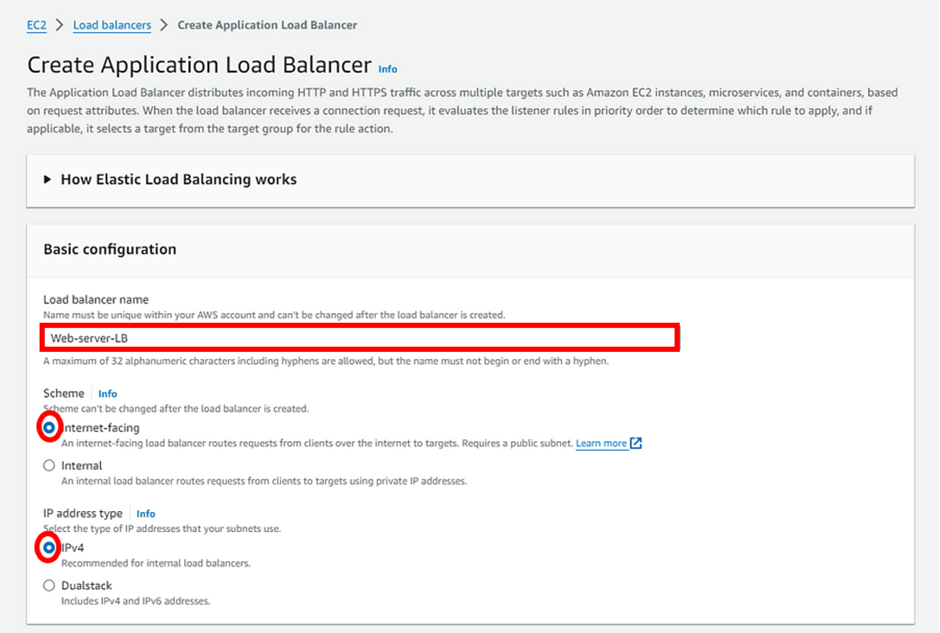
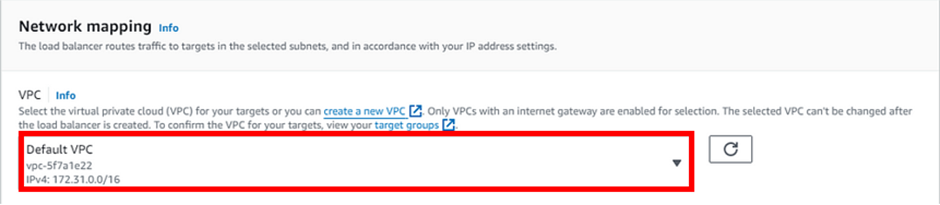
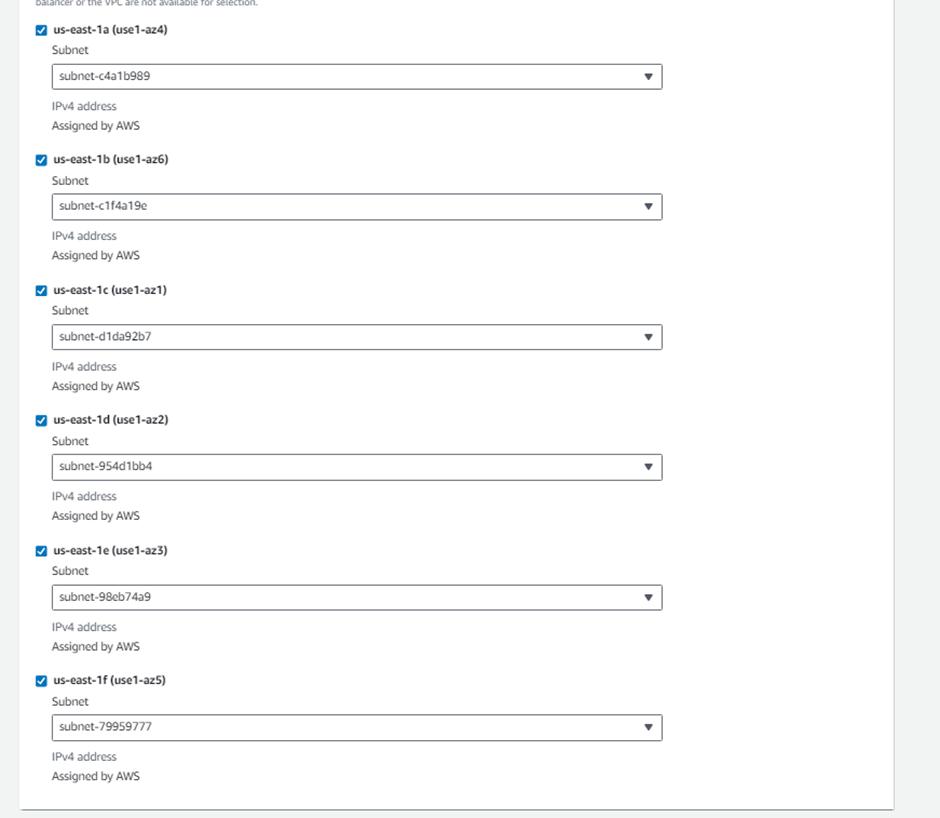
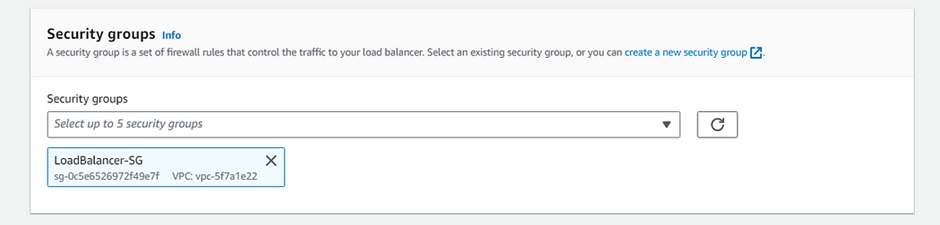
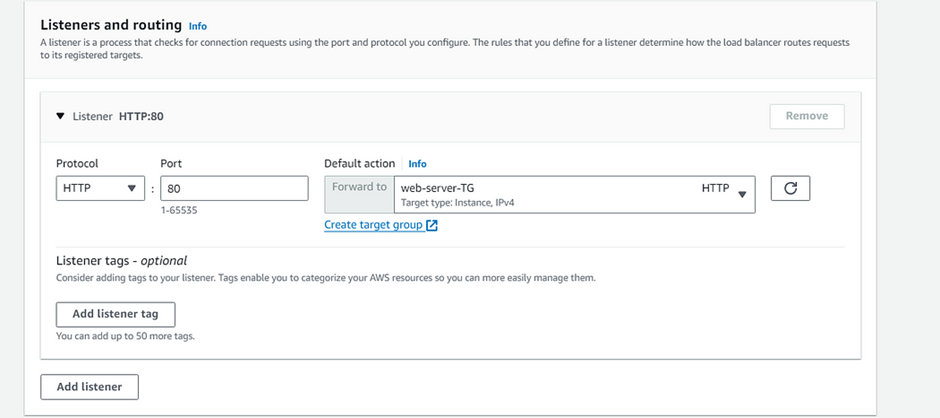
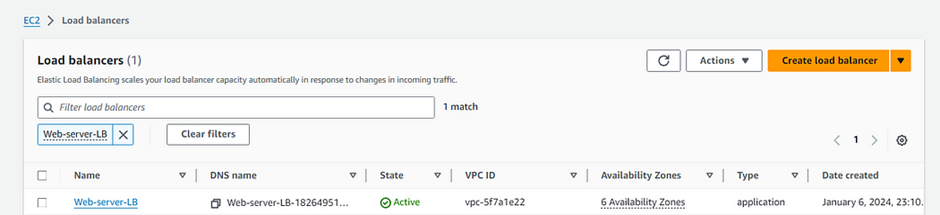
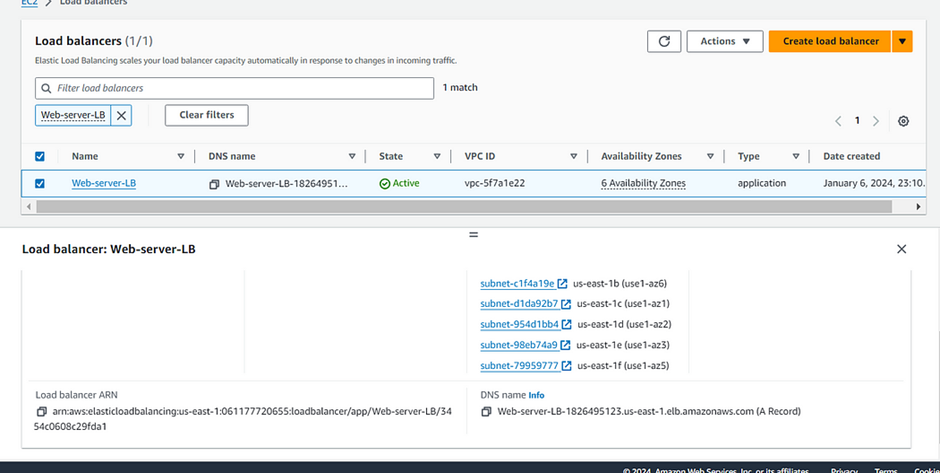
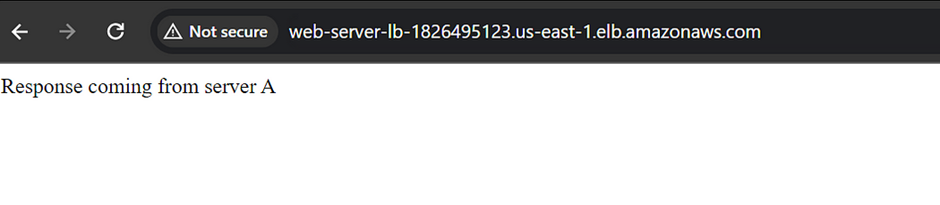
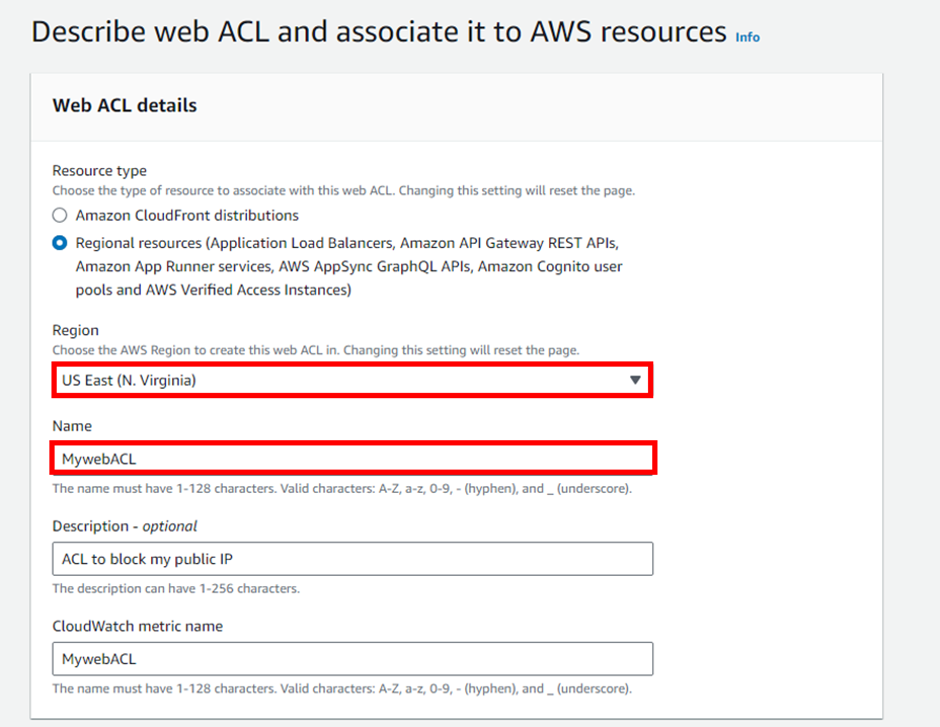
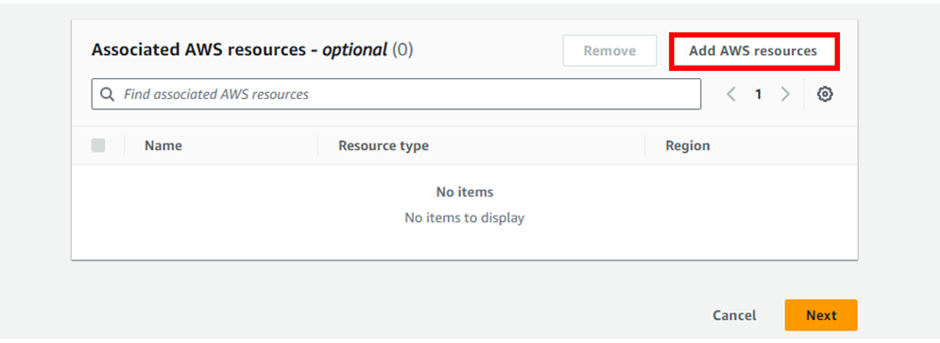
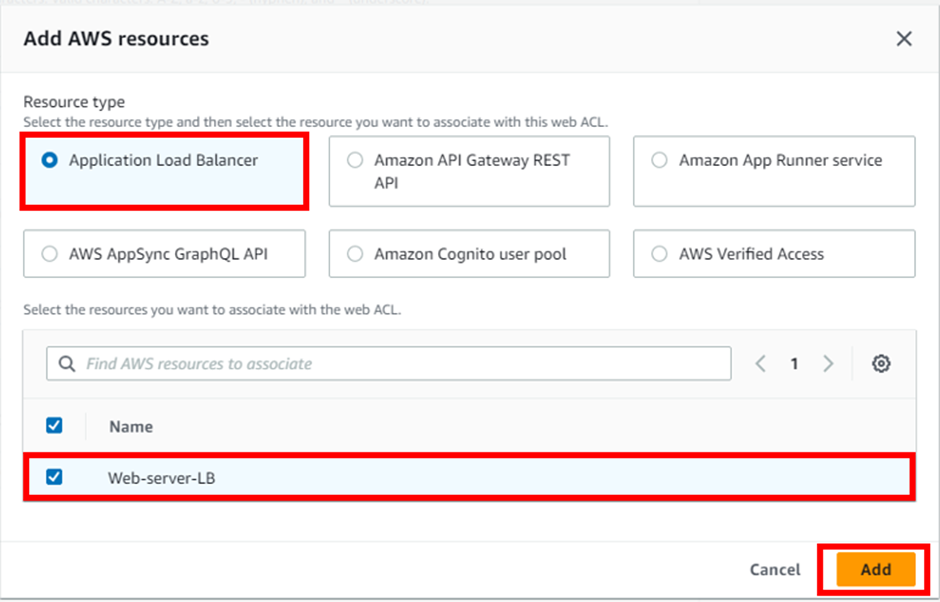
AWS WAF supports and can be used to control how resources like Amazon CloudFront distribution, Amazon API Gateway REST API, Application Load Balancer (ALB), or AWS AppSync GraphQL API respond to web requests.
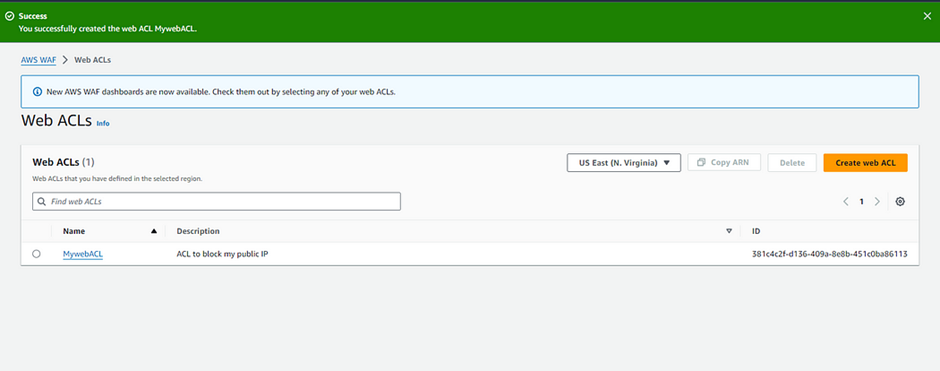
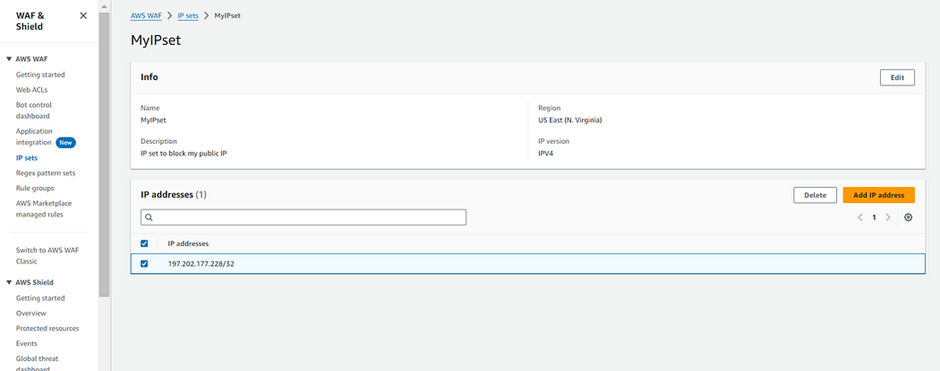
AWS WAF components

Web ACLs — Web Access Control List (Web ACL) is used to protect a set of AWS resources. You create a Web ACL and define its protection strategy by adding rules. Rules define criteria for inspecting web requests and specify how to handle requests that match the criteria. A default action for the Web ACL is a set that indicates whether to block or allow requests that pass the rules inspections. A web ACL is an AWS WAF resource.
Rules — Rules contain a statement that defines the inspection criteria, and an action to take if a web request meets the criteria. When a web request meets the criteria, it is a match. We can use rules to block or allow matching requests. We can also count matching requests using rules.
Rule groups — You can define rules directly inside a web ACL or in reusable rule groups. AWS Managed Rules and AWS Marketplace sellers provide managed rule groups for your use. You can also define your rule groups.

Rule groups are reusable. AWS Managed Rules and AWS Marketplace sellers provide managed rule groups. We can also define our rule groups.
Priority of Rules — If we define more than one Rule in a Web ACL, AWS WAF evaluates each request against the Rules in order based on the Priority value. AWS WAF processes rules with lower priority first. The priorities need not be consecutive, but they must all be different.

AWS Managed Rule groups

AWS WAF Bot control — protection against automatic bots, provides additional visibility through,Cloudwatch, and generates labels that you can use to control bot traffic to your applications (paid rule group, Capacity 50)

Free rule groups

Admin protection — Contains rules that allow blocking external access to admin pages
Amazon IP reputation list — Contains rules based on Amazon threat Intelligence. Useful if you want to block sources associated with bots or other threats
Anonymous IP list — Used to filter out viewers that may try to hide their identity from your applications (e.g. block requests from VPN, proxies, Tor nodes, and hosting providers)
Core rule set — Generally applicable to web applications. This protects a wide range of vulnerabilities, including those described in OWASP publications
I have known Bad inputs — Rules that allow blocking of request patterns that are known to be invalid and associated with exploitations.
Linux operating system — Rules that block request patterns associated with the exploitation of vulnerabilities specific to Linux. Prevent file content exposure and execution of codes by attackers.

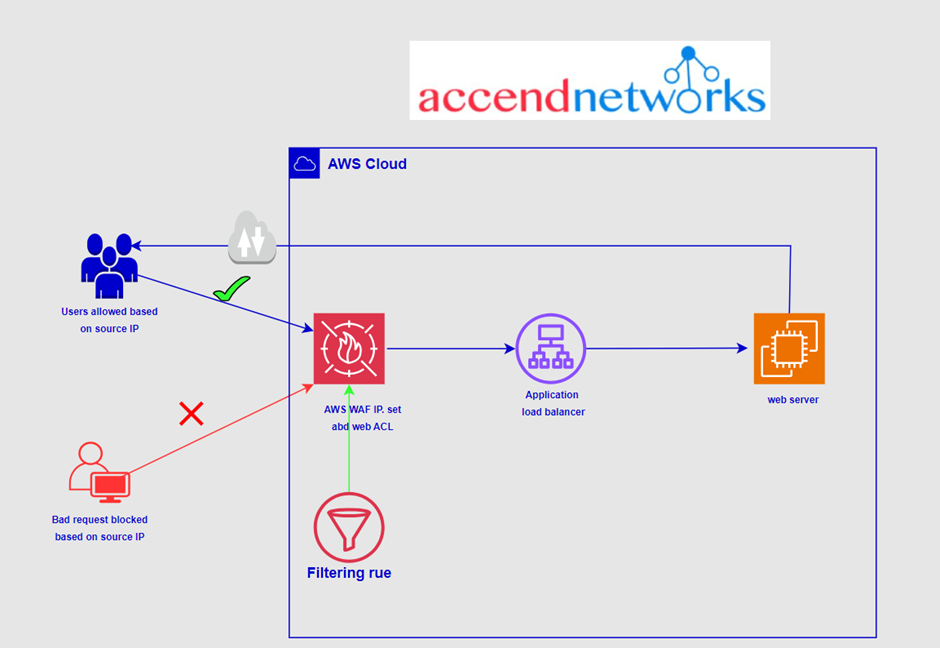
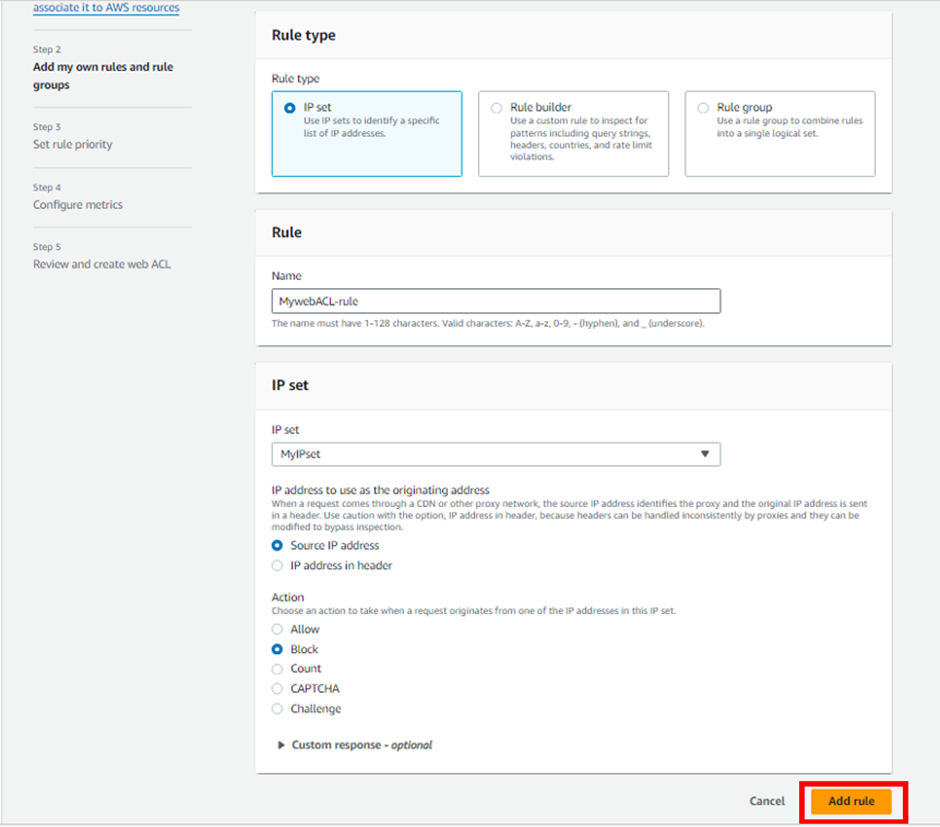
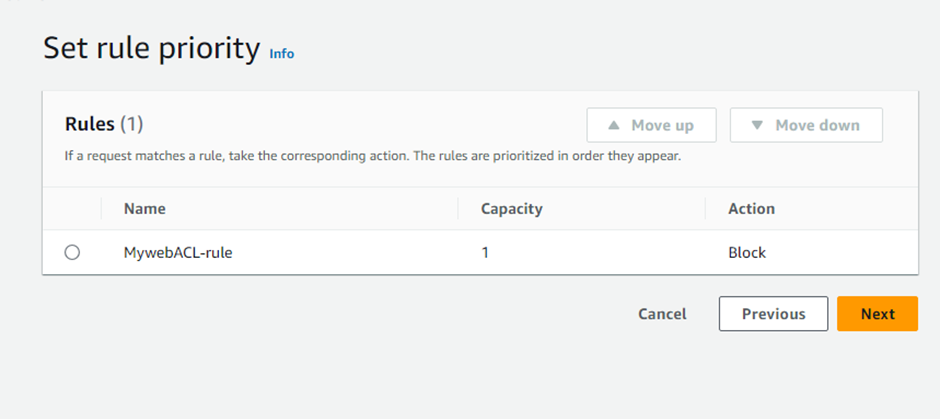
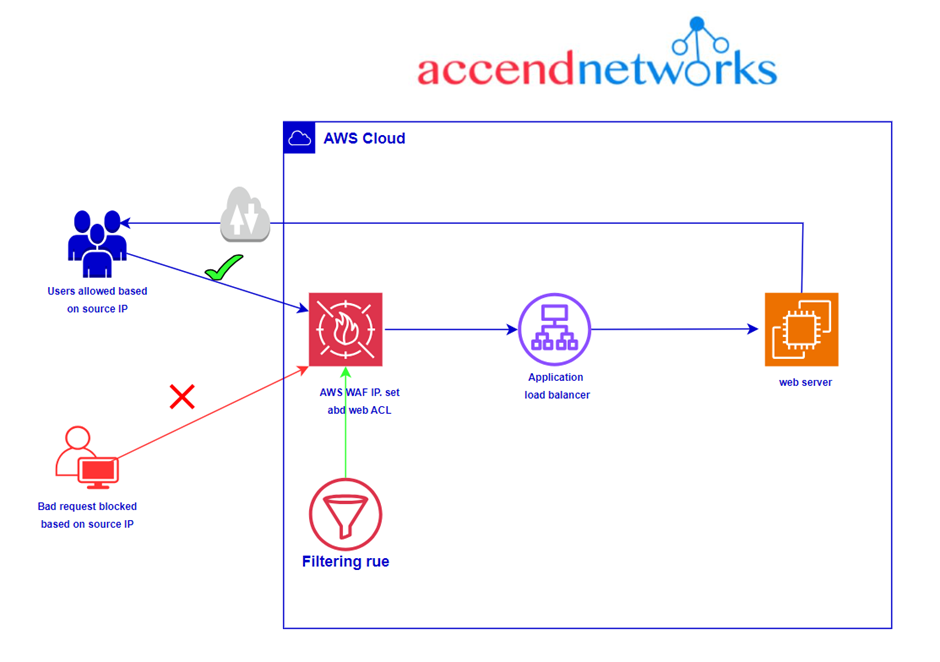
Custom rules can be created to block, allow, or count traffic/access which

  • Originates from a country
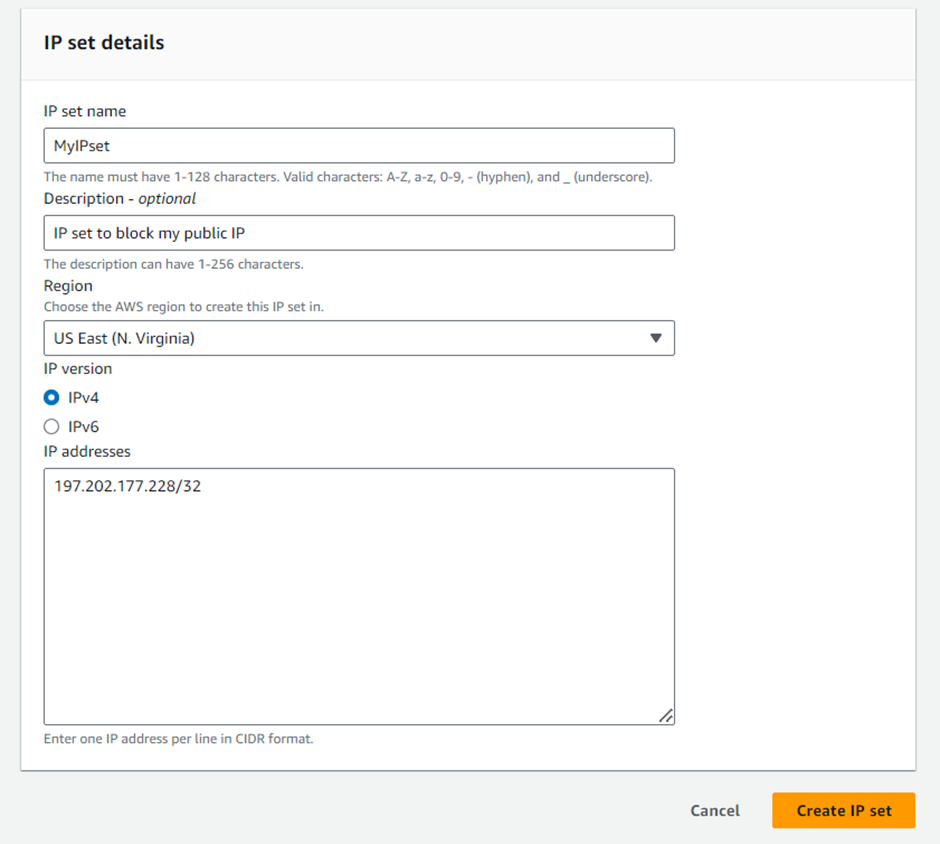
  • Originates from a CIDR range
  • Requests with a specific header, URI path, or body, And also set whether the traffic that does not match any of the Web ACL rules should be blocked, allowed, or counted.
IP Set: An IP set provides a collection of IP addresses and IP address ranges that you want to use together in a rule statement. IP sets are AWS resources.

AWS WAF charges are based on the number of web access control lists (web ACLs) that you create, the number of rules that you add per web ACL, and the number of web requests that you receive.

Web ACL $5.00 per month
Rule $1.00 per month
Request $0.60 per 1 million requests (for inspection up to 1500 WCUs)

AWS WAF web ACL capacity units (WCUs)

Every rule has a relative cost. AWS WAF calculates rule capacity when you create or update a rule. AWS WAF calculates capacity differently for each rule type

Rule group WCUs

The WCU requirements for a rule group are determined by the rules that you define inside the rule group. The maximum capacity for a rule group is 5,000 WCUs.

Conclusion

AWS WAF provides a managed solution to protect your web applications against common exploits and vulnerabilities. By leveraging WAF’s advanced rulesets and integration with services like Application Load Balancer, you can effectively filter malicious web traffic while allowing legitimate users access.

Stay tuned for more.

If you have any questions concerning this article or have an AWS project that requires our assistance, please reach out to us by leaving a comment below or email us at [email protected].

Thank you!

Categories
Blogs

Filtering Traffic with AWS Web Application Firewall Part Two

Filtering Traffic with AWS Web Application Firewall Part Two.

A Web Application Firewall is a specialized security solution designed to monitor, analyze, and filter HTTP traffic between web applications and the Internet.

In this blog article, we will showcase the practical aspects of a WAF in action.
A prerequisite for this demo is you should have two running EC2 instances(webservers) with Apache installed.

We will start by creating an application load balancer. Log into the management console, https://aws.amazon.com/console/ then in the EC2 Console, Navigate to Target Groups, present in the left panel under Load Balancing. Click on the Create target group then Specify group details.
Under Basic configurations,

Choose a target group: Choose Instances

Target group name : Enter web-server-TG

Keep all the settings as default.

Health check protocol: HTTP

Health check path: Enter /index.html

Scroll down and click the Next button.

Register targets.

For this project have already created two instances and called them webservers A and B. And bootstrapped with the bellow code. The code Echo’s response coming from webserver’s A and B.
I will select both instances and click on the Include as pending below button.
Instances will be present in the Review target’s part, having health status as Pending. Click on the Create target group button.
success.
After creating Target group, proceed and create load balancer. In the EC2 console, navigate to Load balancers the left-side panel then Click on Create load balancer. We will create an application load balancer.
Under the Application load balancer, click on the Create button.
configure the load balancer as below

For the Basic configuration section,

Name: Enter Web-server-LB

Scheme: Select Internet-facing

IP address type: Choose IPv4
For the Network mapping section:

Move with the Default VPC.
Mappings: Select all the AZ’s present.
For the Security groups section, I have created a security group and opened port 80 for HTTP, and called it Load balancer-SG, I will select it.
For the Listeners and routing section,

The listener is already present with Protocol HTTP and Port 80.

Select the target group web-server-TG for the Default action forwards to option.
Keep the tags as default and click on the Create load balancer.
copy the DNS name of the load balancer and paste it into your browser.
Refresh the browser a few times and you will see the request is serving from both instances (servers). You will see the output as RESPONSE COMING FROM SERVER A & RESPONSE COMING FROM SERVER B.

Creating an IP set

In the search box, type WAF & Shield then select it under services.
On the left side, you will be able to see the IP sets menu. Click on IP sets and click on Create IP sets.
On the next screen, fill out the details under Create IP set.

IP set details:

IP set name: Enter MyIPset

Description: Enter IP set to block my public IP

Region: Select US EAST (N.Virginia )

IP Version: Select IPv4

IP address: Enter the IP of your local network/32

Note: You have to give /32 after the IP is pasted or else you won’t be able to create an IP set. Then once you have provided the above details, click on Create IP set.

Creating a Web ACL

Web ACL details,

Navigate to the AWS WAF dashboard and select Web ACLs. Click on Create web ACL to create a new web ACL.
Configure the ACL as below:

Web ACL details

Name: Enter MywebACL

Description: Enter ACL to block my public IP

Resource type: Select Regional resources (Application Load Balancer and API Gateway)

Region: Select US EAST (N.Virginia)
To associate an AWS resource, click on Add AWS resources.
In Add AWS resources select Application Load Balancer and select the name of ALB. Click on Add.
Lastly, click on the Next button.

Add rules and rule groups

Under Rules click on Add rule and Add my own rules and rule groups in the drop-down menu.

In Rule typeselect IP set as shown below and fill in the details as given below:

Rule type: Select IP set

Name: Enter MywebACL-rule

IP set: select the IP set created Above (MyIPset)

IP address to use as the originating address: Source IP address

Action:Select Block

Once you provide the above details, click on the Add rule.
Lastly, click on the Next button.

Set rule priority

Leave as default and click on Next.
Configure metrics.

Leave as default and click on Next.

Review and create web ACL

Review all your inputs and click on Create Web ACL

We have successfully created a web ACL for ALB with the help of an IP set created with your public IP.

Testing the working of the WAF.

To test the WAF, navigate to Load Balancers and select the Application load balancer Web-server-LB.

Copy the DNS name and paste it into your browser.

You will get a 403 forbidden error showing that WAF blocked your connection to ALB.

Unblocking the IP.

To unblock the IP, navigate to IP sets and click on MyIPset. Select your public IP and then click on Delete
You have successfully removed the IP from WAF.

Again, select load balancer you just created. Copy its DNS name and paste into your browser.

This time around, you will get the response from the web servers either stating RESPONSE COMING FROM SERVER A or RESPONSE COMING FROM SERVER Bas shown below:
Congratulations, you are all done. Thanks for reading and stay tuned for more.

If you have any questions concerning this article or have an AWS project that requires our assistance, please reach out to us by leaving a comment below or email us at [email protected].

Thank you!

Categories
Blogs

How To Create Serverless Computing with AWS Lambda

How To Create Serverless Computing with AWS Lambda.

In the ever-evolving landscape of cloud computing, AWS Lambda has emerged as a revolutionary service, paving the way for serverless computing. This paradigm shift allows developers to focus on building and deploying applications without the burden of managing servers.

What is Lambda

AWS Lambda is a compute service that lets you run code without provisioning or managing servers.


Lambda runs your code on a high-availability compute infrastructure and performs all of the administration of the compute resources, including server and operating system maintenance, capacity provisioning automatic scaling, and logging. With Lambda, all you need to do is supply your code in one of the language runtimes that Lambda supports.


You organize your code into Lambda functions. The Lambda service runs your function only when needed and scales automatically. You only pay for the compute time that you consume — there is no charge when your code is not running.

Things That Can Cause Lambda Capabilities

AWS source triggers (DynamoDB functions, S3 situations, Message Queue functions, and so on)

AWS endpoints (Relaxation calls)

Key Features of AWS Lambda:

Event-driven: AWS Lambda is designed to respond to events from various AWS services or custom events e.g. changes to data in an Amazon S3 bucket, updates to a DynamoDB table, etc.
Multiple Programming Languages: Lambda supports multiple programming languages, including Node.js, Python, Java, Go, Ruby, and .NET Core.
Automatic Scaling: Lambda automatically scales based on the number of incoming requests.
Cost-Efficient: AWS Lambda follows a pay-as-you-go pricing model. You are charged only for the compute time consumed by your code.
Built-in Fault Tolerance: AWS Lambda provides built-in fault tolerance by automatically distributing the execution of functions across multiple availability zones.

Use Cases for AWS Lambda:

Real-time File Processing: AWS Lambda can be used to process files uploaded to an S3 bucket in real-time.
Microservices Architecture: Lambda functions are well-suited for building microservices, allowing developers to break down large applications into smaller, manageable components promoting agility and maintainability.
API Backend: With the help of API Gateway, AWS Lambda can be used to build scalable and cost-effective API backends. This allows developers to focus on building the application’s logic without worrying about managing servers.
Data Transformation and Analysis: Lambda functions can process and analyze data from various sources, providing a serverless solution for tasks like log processing, data transformation, and real-time analytics.

Create a Lambda function with the console

Log into the management console and type lambda in the search box then select lambda under services.
In the lambda dashboard on the left side of the navigation pane, select function then click create function.
In the create function dashboard, Select Author from scratch then in the Basic information pane, for Function name enter mytestfunction.

Then for Runtime, choose Node.js 20.x

Then scroll down, leave the architecture set to x86_64, and choose the Create function.
Remember default, Lambda will create an execution role with permissions to upload logs to Amazon CloudWatch Logs.
These are the only settings we need to create our function so scroll down and click create function.

Lambda creates a function that returns the message Hello from Lambda!

Lambda creates a function that returns the message Lambda also creates an execution role for your function. An execution role is an AWS Identity and Access Management (IAM) role that grants a Lambda function permission to access AWS services and resources.

To see the role scroll down and select the configuration tab then select permission, in the execution role under the role name you can see the role.
When you select it, it will take you to the I am console and you can see the policy.

Now back to lambda under code, we can see the Hello from Lambda! Code.

We will change this code with a different code Choose the Code tab.

In the console’s built-in code editor, you should see the function code that Lambda created. Then we will replace this cord with our code as shown below.
Select Deploy to update your function’s code. When Lambda has deployed the changes, the console displays a banner letting you know that it’s successfully updated your function.
Invoke the Lambda function using the console.
To invoke our lambda function using the Lambda console, we first create a test event to send to our function. The event is a JSON-formatted document.

To create the test event

In the Code source pane, we will choose Test then you will be taken to configure the test console.

select Create new Event, then for Event name enter myTestEvent In the Event JSON panel, we will paste in our code as shown below. Then we choose to save.
We will now test our function and use the Lambda console and CloudWatch Logs to view records of our function’s invocation.

To test our function, In the Code source pane, we will choose Test. Then wait for our function to finish running. We will see the response and function logs displayed in the Execution results tab as shown below. This confirms that our lambda function was invoked successfully.
This brings us to the end of this blog.

Pull down and stay tuned for more.

If you have any questions concerning this article or have an AWS project that requires our assistance, please reach out to us by leaving a comment below or email us at [email protected].

Thank you!

Categories
Blogs

Find Out What Decoupling Workflows in AWS Is

Find Out What Decoupling Workflows in AWS Is

Decoupling workflows involves breaking down the components of a system into loosely connected modules that can operate independently. This not only enhances scalability and flexibility but also improves fault tolerance, as failures in one component do not necessarily impact the entire system. AWS provides a variety of services that facilitate decoupling, such as AWS Simple Queue Service (SQS), AWS Simple Notification Service (SNS), and AWS Step Functions.

To explain this, we will use this scenario.

Direct Integration in Application Components

Direct Integration in Application Components
Consider the front end, also known as the web tier, where user interactions take place. This internet-facing layer is where crucial data, such as customer orders, originates. Moving seamlessly to the next layer, we encounter the app tier. This tier is responsible for processing the incoming orders and managing other relevant information received from the web tier.

In a direct integration scenario, the web tier and the app tier are connected without intermediary components. This approach does come with lots of challenges.

One significant drawback arises when the app tier is required to keep pace with the incoming workload. In the event of a sudden surge in demand, such as an influx of customer orders, the app tier must be capable of scaling up rapidly to handle the increased load. This real-time scalability requirement is essential to prevent any system failures and ensure a seamless customer experience.

We can use auto-scaling mechanisms in such scenarios. Auto-scaling, although efficient, involves the automatic launch of instances to meet the rising demand. However, the time taken for these instances to become operational may introduce delays, potentially leading to the loss of critical information. In the context of customer orders, this delay could result in a lost customer order.

Decoupled Workflows

Instead of having the web tier and the app tier directly connected, we’ll put an SQS queue in the middle.

The web tier now talks to the queue and puts in orders as messages. The app tier, on the other hand, keeps an eye on the queue by checking if there are any messages to be processed. If there’s a sudden flood of orders, the queue can handle it easily. More orders just wait in the queue until the app tier is ready to process them. hence, no stress of the app tier keeping up with all the workloads at once. if there is a sudden huge amount of information coming in and lots of orders being placed, then the queue can scale very easily. So, we’ll just end up with a lot more orders in the queue awaiting processing. The app tier may need to scale but it doesn’t have the issue of direct integration where the orders might be lost because they can sit in the queue for quite a bit of time and the app tier can process them as soon as it’s ready.

We can also see decoupling in Lambda invocations where we have synchronous and synchronous invocation of Lambda functions.

When you invoke a function synchronously, Lambda runs the function and waits for a response. With this model, there are no built-in retries. You must manage your retry strategy within your application code.

On the other hand, by decoupling lambda functions, and using a synchronous invocation, we see lots of added advantages, as our Lambda function must not keep up with the surge of events but just poll the queue.

A destination can send records of asynchronous invocations to other services. You can configure separate destinations for events that fail processing such as a dead letter queue to handle failed messages for later analysis as to why the messages could not be processed. With destinations, you can address errors and successes without needing to write more code.

Benefits of Decoupling Workflows on AWS Cloud

Fault Tolerance: By reducing dependencies, decoupled workflows make systems more resilient to failures in individual components.
Improved Performance: Decoupling can lead to improved performance, especially in scenarios where synchronous invocations might introduce bottlenecks.
Enhanced Maintainability: Independent components are easier to maintain, update, and replace without affecting the entire system.

Conclusion

Decoupling workflows on the AWS Cloud is a fundamental architectural approach that enhances the scalability, reliability, and flexibility of systems. developers can design systems that meet specific performance requirements and effectively manage workloads.

Stay tuned for more.

If you have any questions concerning this article or have an AWS project that requires our assistance, please reach out to us by leaving a comment below or email us at [email protected].

Thank you!

Categories
Blogs

How To Create AWS Certificate Manager

AWS CERTIFICATE MANAGER

The world of digital security is complex and ever-evolving, requiring businesses and organizations to deploy various mechanisms to secure their digital assets. A significant component of this digital security spectrum is SSL/TLS X.509 certificates. Let’s start our deep dive into AWS Certificate Manager by first understanding these.

Understanding SSL/TLS X.509 Certificates

Secure Sockets Layer (SSL) and Transport Layer Security (TLS) are digital files that use X.509 certificates, a public-key certificate that adheres to the X.509 standard. The certificate establishes a secure connection by pairing a public key with the identity of a hostname, organization, or individual.

These certificates serve two primary functions:

1. Authentication:They validate and confirm the identity of a host or site, enhancing the trust factor for users.

2. Data Encryption: They protect data transferred to and from a website, ensuring it can only be read by the intended recipient.

These SSL/TLS X.509 certificates are issued by a trusted Certificate Authority, responsible for verifying the credentials of the entity requesting the certificate.

Introduction to AWS Certificate Manager

AWS Certificate Manager (ACM) is a service designed to streamline and automate the management of public and private SSL/TLS X.509 certificates and keys. ACM offers an integrated solution to protect your AWS websites and applications. It can issue certificates directly or import third-party certificates and can be used to secure singular domain names, multiple specific domain names, wildcard domains, or combinations thereof.

ACM also provides wildcard certificates, capable of protecting unlimited subdomains. For enterprise customers, ACM offers two main options:
1. AWS Certificate Manager (ACM): Ideal for those requiring a secure web presence using TLS.

2. ACM Private Certificate Authority (CA): For those aiming to build a Public Key Infrastructure (PKI) for private use within an organization.

Services Integrated with Certificate Manager

AWS Certificate Manager is integrated with several AWS services, providing seamless SSL/TLS certificate management to mention a few.
1. ELB: ACM deploys certificates on the Elastic Load Balancer to serve secure content.

2. CloudFront: ACM integrates with CloudFront, deploying certificates on the CloudFront distribution for secure content delivery.

4. Elastic Beanstalk:You can configure the load balancer for your application to use ACM.

6. API Gateway: Set up a custom domain name and provide an SSL/TLS certificate using ACM.

8. CloudFormation: ACM certificates can be used as a template resource, enabling secure connections.

Additional Concepts in Certificate Manager

Remember that ACM certificates are regional resources. You must request or import a certificate for each region to use a certificate with ELB for the same fully qualified domain name or set of fully qualified domain names in more than one region. Also, you need to request or import the certificate in the US East region to use an ACM certificate with CloudFront.

We will register for a free SSL certificate from the AWS certificate manager.

To register for a free SSL certificate, in the management console, in the search box, type certificate manager, then select certificate manager under services.
Remember, the certificate manager only works in the US-east-1 region, so ensure it’s selected.

Then in the certificate manager console, click request certificate.

We will request a public certificate so click the radio button then click next.

Under domain name, enter the domain name you want to request the certificate for, so enter your domain name, then click add another name for this certificate to add a wild card for your domain. The wild card allows you to have www.yourdomainname.com

In the search box, type *.yourdomainname then scroll down.
Under validation method, select DNS validation and that’s the recommended method. Click request.

Click view certificate.

The status is pending validation, this is because it has not yet been validated. To validate the certificate, we have to create a record set in Route 53 to validate our domain name.

To create a record in route 53, AWS has made it very easy, all you have to do is click create a record.

On this page, select the domain name you are creating a record set for in route 53. So make sure you have checked your domain name and wild card then click Create Record.
We have successfully created a DNS record in route 53, for our domain name validation.
Now click the refresh button and you will see that the SSL certificate status has been issued.

And for the two domain names we requested a certificate for, the status is a success.

This is how you request a free SSL certificate from the AWS, certificate manager.
This brings us to the end of this blog.

Stay tuned for more.

If you have any questions concerning this article or have an AWS project that requires our assistance, please reach out to us by leaving a comment below or email us at [email protected].

Thank you!